How to Build a Compost Bin for Your Home Garden?
Are you tired of throwing away your kitchen scraps and yard waste in the trash? Want to start composting but don’t know where to begin? Look no further! Building a compost bin for your home garden is easy, inexpensive, and will help reduce your carbon footprint.
Not only does composting provide rich organic soil for gardening, but it also reduces landfill waste and greenhouse gas emissions. In this blog post, we’ll show you step-by-step how to build a simple yet effective compost bin that will keep your garden thriving all year long. Let’s get started!
Composting
Composting is an easy way to reduce your waste, while also providing valuable nutrients for your garden. It’s a simple process of breaking down organic materials, like kitchen scraps and leaves, into a nutrient-rich soil amendment.
To start composting, you’ll need a bin or pile in which to mix your materials. You can purchase a bin specifically designed for composting, or build one yourself using repurposed materials. Once you have your bin set up, it’s time to start adding material to it.
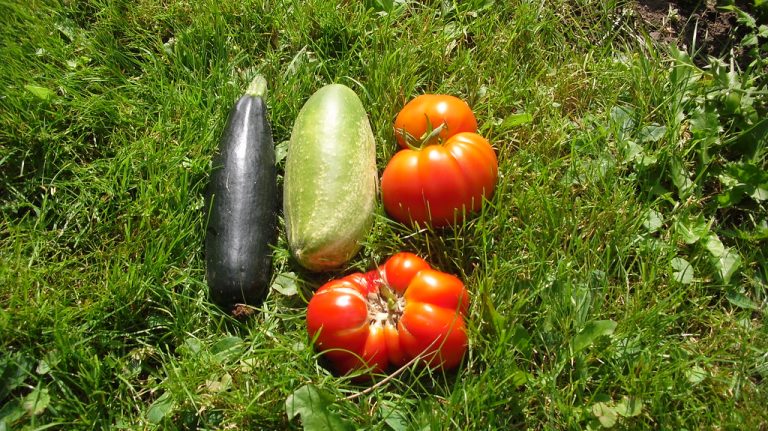
The key is to create a balance of “green” materials (high in nitrogen) and “brown” materials (high in carbon). Greens include things like fruit and vegetable scraps, grass clippings, and coffee grounds. Brown materials include things like dead leaves, twigs, and shredded newspaper.
As you add material to your bin, be sure to mix it well so that everything breaks down evenly. You’ll also need to add water occasionally to keep the material moist – but not too wet – as this will help speed up the decomposition process. After about six months of periodic turning and watering, you should have some rich compost ready to use in your garden!
Benefits of Composting
Composting is a great way to reduce your household waste and save money on mulch and fertilizer for your garden. It is also an excellent way to help the environment by reducing methane emissions from landfills.
Here are some of the benefits of composting:
-It reduces the amount of trash that goes to landfills.
-It helps fertilize your garden without using chemical fertilizers.
-It saves you money on mulch and fertilizer.
-It helps improve soil structure.
-It decreases water usage in your garden.
-It attracts earthworms and other beneficial organisms to your garden.
Supplies and Materials
If you’re looking to start composting in your home garden, one of the first things you’ll need is a compost bin. In this article, we’ll show you how to build a simple and easy-to-use compost bin for your garden using supplies and materials that you can find around the house.
Here’s what you’ll need to build your own compost bin:
- A large plastic container with a lid. This will be your main bin where you’ll add all of your compostable materials. Look for a container that’s at least 30 gallons in size so that you have plenty of room to add material as it breaks down.
- A smaller plastic container with a lid. This will be used as a holding bin for any finished compost that’s ready to be used in your garden. Again, look for a container that’s at least 10 gallons in size so that you have enough room to store finished compost.
- Drill or punch holes into the bottom and sides of both containers for aeration purposes. The holes should be large enough for air to flow freely, but small enough so that material won’t fall out.
- Place the larger container inside the smaller container and fill it with about 2-3 inches of compostable material such as leaves, grass clippings, fruit and vegetable scraps, coffee grounds, eggshells, etc. Be sure to mix in some carbon-rich materials such as newspapers or cardboard to help with aeration as well as keep things balanced.
- Place the lid on your larger container and then place the smaller container over it. This will keep things contained while still allowing air to flow freely through the holes in both containers.
- Place your compost bin in a sunny spot in your garden and check on it regularly. Mix the material every week or so to ensure proper aeration, and be sure to add water occasionally if things seem too dry. You’ll know that your compost is ready when it has a nice dark color and earthy smell.
Instructions for Building a Compost Bin
If you’re looking to start composting at home, one of the simplest ways to get started is by building your own compost bin. Here’s a step-by-step guide to help you build a basic compost bin in no time:
- Start by finding a suitable location for your compost bin. It should be close to your garden so that it’s easy to access, but out of the way enough that it won’t be an eyesore.
- Once you’ve found the perfect spot, mark out an area that’s approximately 3×3 feet. This will be the footprint of your bin.
- Using either 4x4s or 6x6s, create the frame for your bin by nailing the lumber together at the corners.
- Next, attach chicken wire or hardware cloth to the frame, making sure that there are no gaps larger than 1 inch. This will keep animals out and allow air to circulate throughout the compost pile.
- Now it’s time to add some drainage holes to the bottom of your bin. Drill or punch holes all over the bottom (about 10-15 should do), then line the bottom with landscaping fabric or old burlap sacks to prevent soil from seeping out.
- Fill your bin with alternating layers of green and brown materials – things like grass clippings, leaves, and vegetable scraps make great green materials; while straw, sawdust, and newspaper can all act as great brown materials.
- Once you’ve filled up the bin, dampen the contents with a hose and give it a good mix. This will help speed up the composting process.
- Finally, add some worms to your mix – they’ll do an amazing job of aerating and breaking down the organic matter!
And that’s it – you now have your very own compost bin! Now just sit back and enjoy watching your nice, healthy compost pile come together over time.
Maintaining Your Compost Bin
- Keep your compost bin in a shady spot in your garden, and make sure it has good drainage.
- Add a layer of organic material to your bin each time you add food scraps or yard waste. This will help aerate the compost and speed up the decomposition process.
- Stir the contents of your bin regularly, and add water if it starts to dry out.
- When your compost is ready, it will be dark and crumbly. Use it to fertilize your plants, or spread it on your lawn as a natural weed inhibitor.
Mistakes When Building a Compost Bin
One of the most common mistakes people make when building a compost bin is using the wrong materials. Wood rots, so it’s not a good choice for the base or sides of your bin. Stone or concrete blocks are a better option.
Another mistake is not making the bin big enough. It should be at least 3 feet wide and 3 feet deep to allow enough room for adequate aeration and decomposition.
Another common error is not placing the bin in the right location. It should be in a sunny spot that’s close to your garden so you can easily add kitchen scraps and yard waste. But it shouldn’t be too close to your house because you don’t want smells emanating from the bin.
Finally, people often forget to add drainage holes to their compost bin. This is important because excess moisture can lead to odors and slow down the composting process.
Conclusion
Building a compost bin for your home garden is an excellent way to reduce your ecological footprint and enrich the soil in your garden with beneficial nutrients. Not only that, but it also provides you with a great opportunity to get creative and find unique ways of using recycled materials in order to create something really useful.
With our guide on how to build a DIY compost bin, we hope that you now have the information needed to start building great compost bins for yourself and make your garden even healthier!
James is a passionate writer and gardener with years of experience in home gardening. He is the author of several articles and blog posts on HomeGardenBlog.com, a platform where he shares his expertise and love for plants and gardening with the world.